https://m.media-amazon.com/images/S/vse-vms-transcoding-artifact-us-east-1-prod/33d4f14c-bad7-4a91-8348-3f947c6ebed9/default.jobtemplate.hls.m3u8
https://m.media-amazon.com/images/S/vse-vms-transcoding-artifact-us-east-1-prod/b35c2cb1-caee-493c-af64-705ec7ec607a/default.jobtemplate.hls.m3u8
https://m.media-amazon.com/images/S/vse-vms-transcoding-artifact-us-east-1-prod/dd185f1e-e970-41a7-9fcf-eae9c144a59a/default.jobtemplate.hls.m3u8
https://m.media-amazon.com/images/S/vse-vms-transcoding-artifact-us-east-1-prod/de3af5bb-8d2c-4396-8f21-f16d203e3684/default.jobtemplate.hls.m3u8
https://m.media-amazon.com/images/S/vse-vms-transcoding-artifact-us-east-1-prod/354a530b-0a77-4dbe-a25c-5e084356e0e1/default.jobtemplate.hls.m3u8
https://m.media-amazon.com/images/S/vse-vms-transcoding-artifact-us-east-1-prod/4ffe88e2-d6d9-4128-9822-9bfad4060fa2/default.jobtemplate.hls.m3u8
Garden, Uncategorised
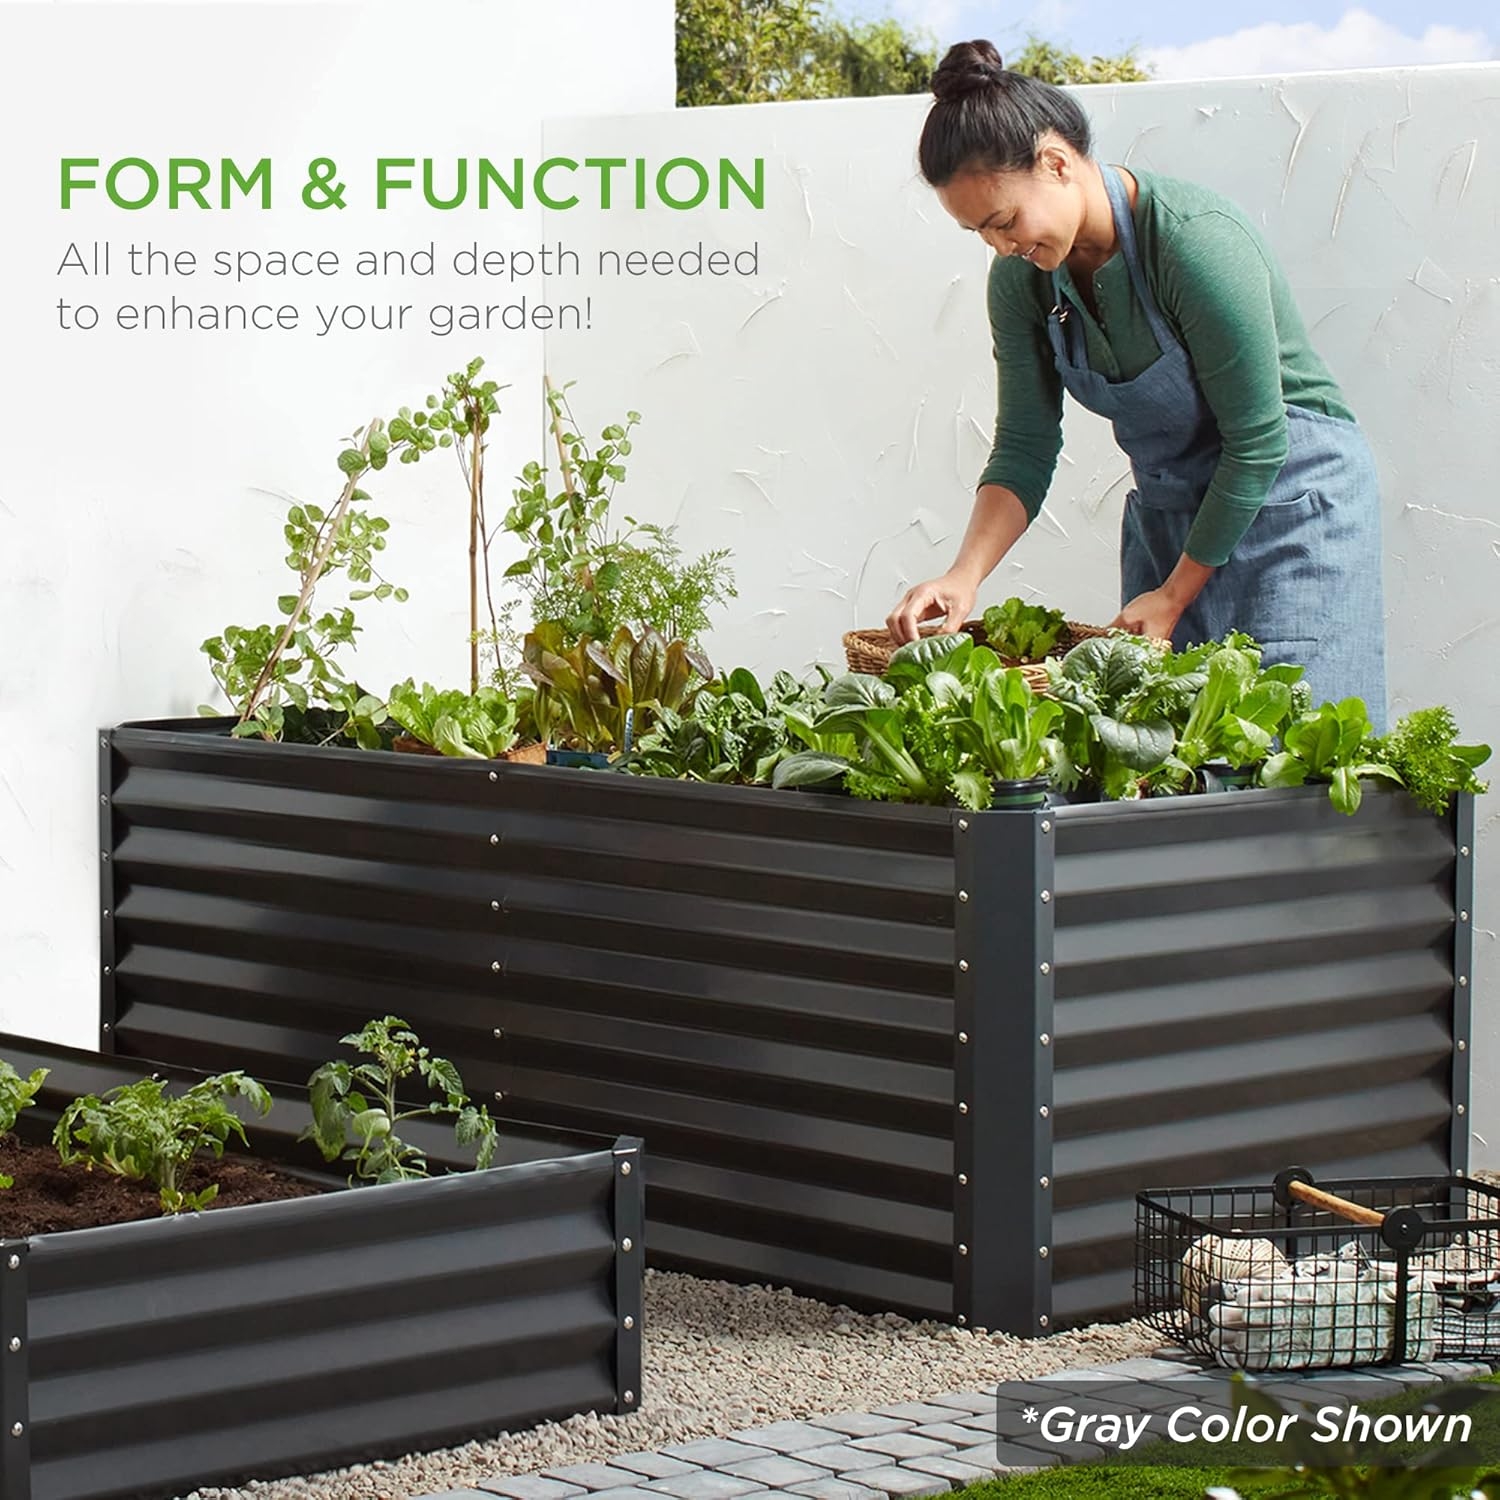
Best Choice Products 6x3x2ft Outdoor Metal Raised Garden Bed, Deep Root Box Planter for Vegetables, Flowers, Herbs, and Succulents w/ 269 Gallon Capacity – Gray
Original price was: $139.99.$89.99Current price is: $89.99.
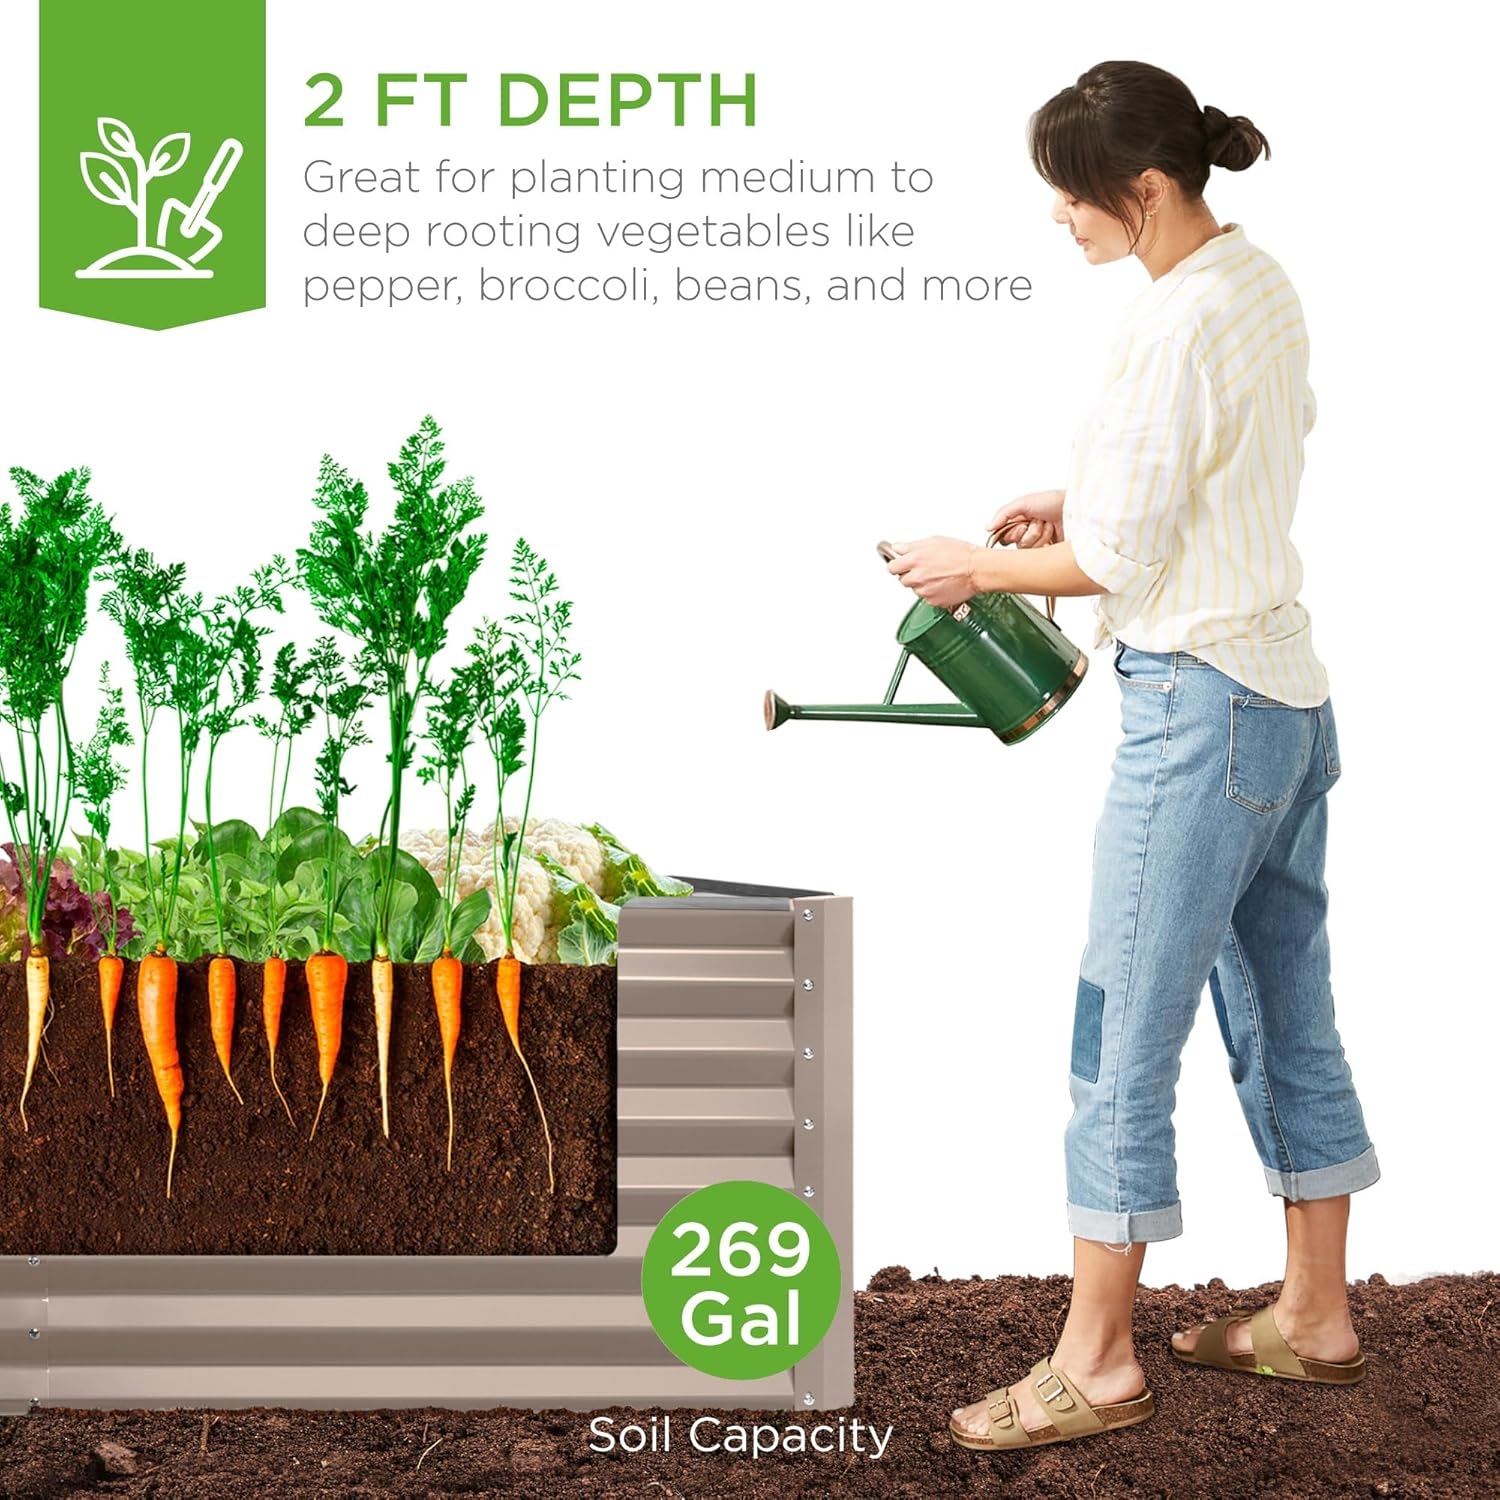
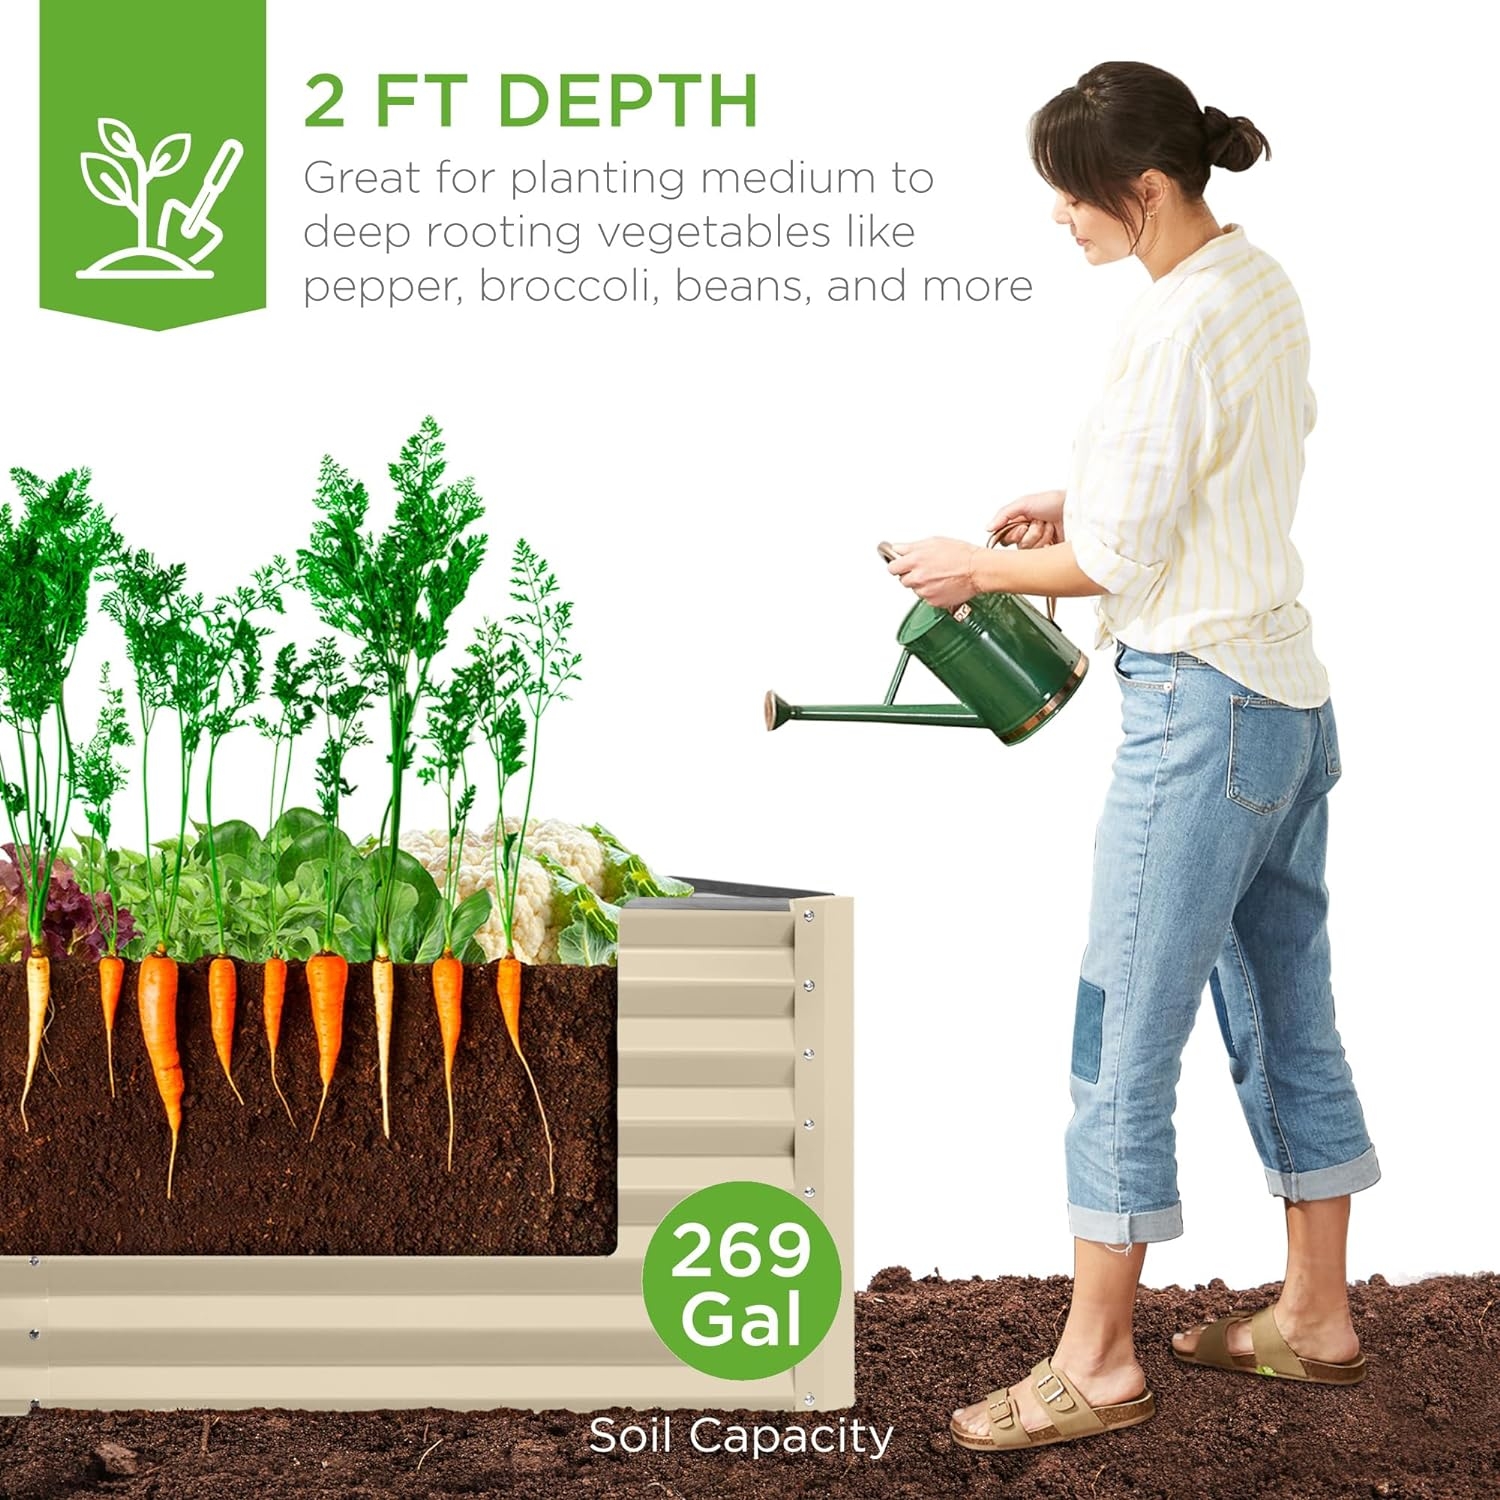
- 2FT GROWING DEPTH: 24 inches of depth holds up to 269 gallons of soil-great for medium to deep rooting plants and vegetables like broccoli, beans, and more. Note: This product does not include a bottom panel
- TOOL-FREE ASSEMBLY: Beveled steel panels come together with a set of included wingnuts and bolts with rubber edging for your added safety
- BUILT TO LAST: Made of powder-coated steel panels, this garden bed is the perfect, sturdy planter for romaine lettuce, cucumbers, strawberries and other seasonal crops
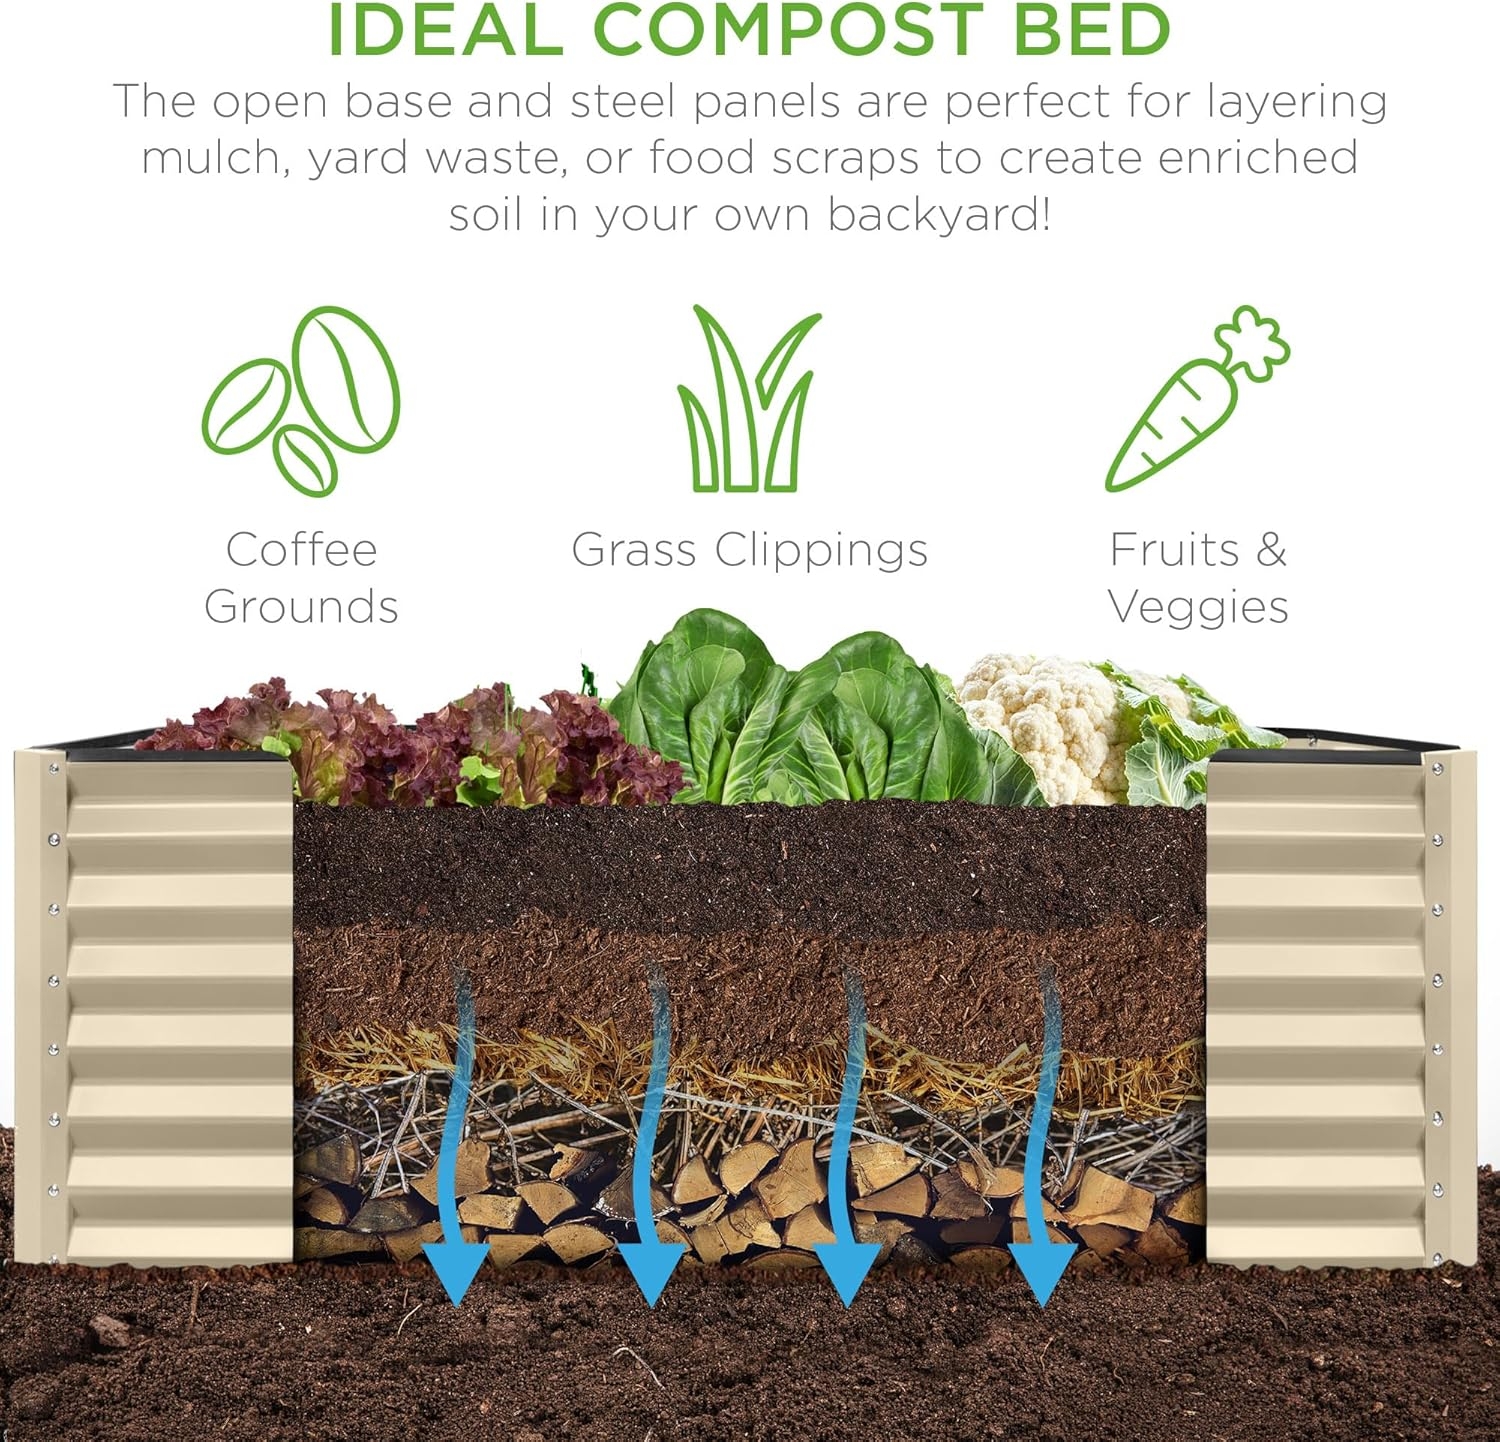
- IDEAL COMPOST BED: An open base combined with the ribbed steel makes this the perfect space to layer yard waste, food scraps, and other additives to create enriched soil at home
- INNER STABILIZING BARS: Two steel support bars help the metal panels retain their shape, preventing warping and soil leakage over time; OVERALL DIMENSIONS: 72″(L) x 36″(W) x 24″(H)
Availability: 15 in stock
| Weight | 15.87572 kg |
|---|---|
| Dimensions | 60.96 × 91.44 × 60.96 cm |
| Number of Levels | 1 |
| Item Dimensions | 24 x 36 x 24 inches |
| Item Weight | 35 Pounds |
| Capacity | 269 Gallons |
| Number of Pieces | 1 |
| Item Dimensions D x W x H | 36"D x 72"W x 24"H |
| Pattern | Solid |
| Shape | Rectangular |
| Theme | Vegetable |
| Style Name | Traditional |
| Planter Form | Raised Bed |
| Color | Gray |
| Finish Types | Powder Coated |
| Material Type | Alloy Steel, Metal, Rubber |
| Indoor Outdoor Usage | Outdoor |
| ASIN | B08X2324ZL |
| UPC | 842957125708 |
| Brand Name | Best Choice Products |
| Included Components | Rubber Trim and Support Bars |
| Plant or Animal Product Type | Succulent, Vegetable, Herb, Flower |
| Mounting Type | Floor Standing |
| Additional Features | Beveled |
| Manufacturer | Best Choice Products |


Fy Nyth –
We added a bunch of these planters along the side of our big, pretty industrial looking, shop building. They have added a lot of space to grow herbs, flowers, and veggies as well as a lot of beauty to an otherwise not very attractive spot on our property. The beds are well made with much stouter metal sheets than I was expecting for the price. They were well packed for shipping and arrived with no damage at all. They are not hard to assemble, but it is much easier with two people and a power screwdriver. Doable with one person and by hand, but if you are assembling 9 of them, that would take a while. The most time consuming part, like others have mentioned, is getting the parts out of their packaging. This seems like something the company could easily fix. Prying every wing nut and bolt free from it’s sticky shrink wrap and having to peel the plastic coating off each metal sheet takes about half of the total time of assembling. While the bubble wrap between sheets that is already there would prevent scratching and putting the hardware in a bag that does not require prying every little piece loose would cut the time to assemble in half while not detracting from anything else. Other than that factor, assembly was quite simple. They are quite sturdy once all the bolts are tightened. We filled with cardboard, then small branches, then a mix of topsoil and well rotted wood chips. We made sure to fill in layers, watering and semi compacting each layer carefully so as to not push any of the sides out of square as we went, but it seemed like that would be fairly hard to do with how sturdy the assembled box is. The finished beds are a wonderful height for working in without bending. They are big and deep enough (we have 6’x3’x2′ beds) to hold moisture pretty well, even in our dry climate, so constant watering is not required. So far, in their first year, they look like they are holding up in like new condition and we expect to get many years and probably a lifetime of use from these beds. We are more than happy with the purchase and would buy more if we ever need beds in another location.
Chica-Dee-Dee –
1 year update — these garden boxes have worked out very well. I have them on a slight slope and dug a bit in to the slope on the back side of each box to ensure each box is level. I currently have 7 of the 6’x3’x2’ boxes. I assembled them myself and moved them to the garden on my own. Not terribly difficult but an extra set of hands would have been helpful.The boxes feel a little flimsy upon being built but once they were places & filled, they were fine. I am careful not to lean on the edges of the boxes as they would surely bend. Also, the support bars are very lightweight and bend very easily, if you’re not careful.As a side note, I did not use the rubber edging/trim that comes w/each box. I can’t imagine it would stay in place & I saw no benefit.I placed my boxes in 2 rows, the rows and boxes are all 3’ apart & the spacing worked out very well. It was easy to maneuver around each of the boxes. I added a hog panel arched ‘trellis’ between the 2 rows of beds. I did not need to use t-posts to secure the hog panel as it is wedged between 2 of the garden boxes (end-to-end).As the boxes are a pretty good size, it took quite a lot to fill them & I followed the ‘lasagna’ method for filling w/cardboard on the bottom, then branches & twigs and leaves & lawn clippings. Then a layer of compost, more grass clippings and finally a mix of garden & top soil. Once planted, I kept the beds mulched all season long w/fresh layers of grass clippings.The boxes are open to the ground on the bottom & I had no issues with drainage. Also, the use of grass clippings as mulch helped minimize the amount of hand watering I needed to do (we did not use any chemicals on our lawn!). Initially, I used hay as mulch for a couple of my boxes & spent the entire season picking weeds from those beds (lesson learned)! The grass mulch definitely helped but I feel like I still watered a fair bit (south facing, full South Carolina sun).I made hoops from bamboo that I split & used 3 hoops per bed & covered them with netting held down w/garden staples to keep birds & other critters at bay. This worked great, even kept the deer out.I added a small compost container with a screw top lid (I cut off the bottom of the container & buried each container so the lid was at the top of the soil). Throughout the season, I added kitchen scraps… egg shells, fruit/veggie peels/skins, etc. to the containers but I think I’ll skip this step this coming season. I’ll continue to compost but will do so in my central compost setup and will amend the soil in the boxes w/compost, as needed.By the end of the growing season, I had experienced multiple inches of settling in each box, as a result of the breakdown of the components of my initial fill method. I expect I’ll add a few inches of a mix of compost, grass clippings/leaves and garden/top soil before planting my boxes this spring.I really do like these garden boxes a lot. They are functional & I am very happy with how they look & how they’re holding up. In fact, I plan to purchase one more box this spring, for a total of 8.
Paul R –
We got this raised flower bed for my wife to use as a garden and she really likes it. She likes the county design and brownish color. The flower bed is very tall so if your planning to fill it all with soil you will need a lot. The flower bed itself is made of a metal that does seem a little flimsy but once you put your dirt in it holds its shape quite well. Fare warning this does take a long time to put together! It is easy to put together and follow the directions but there’s so many screws and such. So just be prepared for that. Once you put it together it is a little heavier and awkward to handle by yourself so you may need another person to help move it to where it’s going. It is a nice size though and has plenty of room for all your crops. Overall my wife does really like this raised flower bed but it doesn’t take quite awhile to out it together.
Beth –
This has been sturdy for year one and was pretty easy to put together- just lots of nuts/bolts/washers to deal with. Make sure you have the correct pieces lined up properly, as two sides are shorter and must be the ends! We didn’t realize this at first and had to take pieces apart and reassemble half way through. Just an error on our end that you can plan for with a quick check in advance.
Amazon Customer –
I got the 6x3x2. I plan on ordering a second one right away. Plus we’re gonna do two of the 8ft now on the other side. How much soil do you need? ALOT. Somewhere around 15x 40lb bags. So be prepared for that. This is not going to fill up easily. We’re talking two feet deep and it’s big. You can fill it with logs and shredded paper at the bottom layer if you don’t have straw.Pros:Cheap but not too cheap(and yes, there is cheaper)Metal so it will never rotSturdy once you’ve got every screw in placeThe increased depth makes it possible to grow anything in itHolds a HUGE amount of crops by square foot gardening methodsLooks beautiful. Can’t complain when it looks this good for sheet metal.Wing nuts makes this job easy, no socket required to hold the nuts.Rubber ribbing that fits the top comes with it if you want it installed, it’s not on in my pictures. If you need to replace it, it’s the same stuff used as ,”car door protector u shape rubber seal.”Cons:Cheaper than the big brands that come with crazy angle brackets and crossmembers and riser blocks so there’s not a tremendous amount of quality from this.The stakes that come with it are garbage. Get some round head plastic stakes and drive them into the peg holes on the corners or this thing is going to fly away out in a field if it’s not densely filled.Layer your soil like pictured.1)Throw down cardboard, not plastic underneath this thing. Lots and lots of cardboard. Plastic will break down and turn into muck, you don’t want that. Just use degradeable cardboards. If you ever have to remove this bed, you can just drag it all out. No picking up plastic pieces.2)Take round 2 inch logs or branches and layer them everywhere so this thing drains. Do not put soil on the bottom of this raised bed!!! The bed will shift and raise up above the soil line and look stupid with time.3)Add sticks, lots of sticks of all shapes and sizes or straw. If you don’t have straw, use shredded paper mulch like I do. This creates an air layer that will break down with time but allows air and water travel at the start of an ecosystem.4)Add composted manure(it is way cheaper than bagged soil and has a nice sand mix to it, to fill this thing with topsoil would be quite alot of money)5)Add your own compost(the clumpier the better)6)Add garden soil7)Top with topsoil and vermiculite, pack it gently with a 2×4. Don’t fill your bed with ,”potting,” soil or the sides will collapse in wind or your plants will fall out from soft root systems, just the top layer should be topsoil. Spread mulch over this as your plants come up.(optional, some people like to see the topsoil)Tip, never empty this bed. You’ll destroy whatever ecosystem you’ve built. If your soil looks dead then remove final crop of plants, remove one to two inches of soil and throw it into your compost. Replace that same depth with fresh soil. If you’re using this as a raised bed for ferns and flowers, use your flower mix in place of garden soil. If you don’t want to remove any soil in the future, use a powdered water soluble fertilizer and you’re done.Raised beds are alot easier than digging ever was.
David C. Handy –
Sure glad they use wing nuts, because it’s easy to assemble. Great look and excellent packaging with thick boxes. Highly recommend.
Sara Westhafer –
Writing a delayed review, because I wanted to see how they held up before commenting. I have 3 beds, and this is my 3rd season for two of them, second season for the other one. They were easy (but time consuming due to all of the screws) to assemble. Two of mine (the oldest two) are built into the side of a hill, and the third is on flat ground. Overall, they are wonderful. They look amazing and they’re incredibly sturdy. My only complaint is that they’re supposed to be powder coated which would mean they’re weatherproof, but all of the corner supports (on all 3 beds) are rusting and the coating is flaking off. I’m going to try and sand them a bit and spray rustoleum on them to protect them and get them to last longer, but am concerned about how long they will remain sturdy since they’re already rusting. There is no way to purchase replacement corner supports, so if they end up rusting completely or weakening, I’ll have to buy entirely new beds.
Cassie Richardson –
Beautiful boxes, very simple to put together, fairly sturdy & great quality materials & color.I love them, but I am disappointed that the color I ordered came looking much more green than blue. It’s a very pretty green, but it’s definitely a bit closer to a forest green than it is blue to be honest.They also could have been packaged a bit better, most of my panels had a bent corner when they arrived. Nothing that kept them from being able to be assembled, but definitely not in the condition you would hope.Either way I’m very happy with my purchase & I highly recommend these boxes, especially for the price. Just make sure you double check the color before you buy.
Marty Hillman –
I made the mistake of leaving the wife to her own devices and assemple these on her day off while I was at work. She paid little attention to any instructions, measurement, or anything one would typically assume would be important when assembling anything. Obviously, she must be a product tester for Ikea. So much for all that labratory training where everything has to be measured precisely.Of the six panels included, two are 2.5 inches shorter and are meant for the end pieces. Where did she install them? On the sides causing me to have ot take them completely apart and rebuild. Of course, she said “all of the panels were the same size in the box”, but somehow it is my fault that two magically shrunk by 2.5 inches upon assembly. How stupid of me to make steel shrink and cause the tape measure to read two differnet sizes when they were clearly all the same size in the box. I am lucky to have her here to keep me in check and honest.There are a ton of screws and wing nuts. OMG! There are over 60 of each holding the thing together. Have a phillips screwdriver handy. If you have a powered one, it should be a breeze. At least they are all easy to reach. It helps having a second set of hands to hold things together while they are screwed in.To give you an idea of volume, it took about 22.5 cubic feet of garden soil (15 bags) and 4 cubic feet of manure per box (we bought two). They are almost full. There is about 3-4 inches of emptiness at the top which is fine for our needs. We are only planting tomatoes in one, and curly leaf parsley in the other as food for the Tiger Swallowtail caterpillars that love to spend the summers feasting on it. The robin that built its nest above it basically has their own DoorDash.This is the first year. They are quite sturdy. I will have ot report back next year on any rusting or deterioration. Since we have concrete and gravel under them, the stakes were not used, but with all the weight of the dirt, they are not going to be at risk of blowing away. The biggest issue is that it brings the tomatoes lower into the easy reach of our dogs who love to eat the cherry tomatoes.One day, I will plant something for myself in them. Maybe the next person that tells me it is my fault for shrinking corrugated steel plates. Maybe flowers. I suppose it could be both.
Amazon Customer –
Was very easy to put together, then I realized it was bigger than what I envisioned for my space & being 1 person to move it. I wanted to get 2 more end panels & corner pieces so I could break it down to 2 smaller ones. The company does sell extra pieces, so I wanted to return it. They issued my refund but they don’t want the product back. I’m currently looking to find a community garden/school to donate it too.